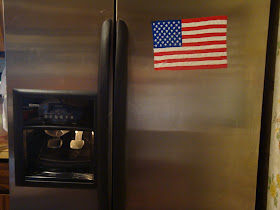
For those of you that were around when I auditioned for the SYTYC competition and who read this post, I have finally got the tutorial done for the anywhere clings.
With 4th of July coming up I thought that I would do the American Flag for this tutorial.
First I choose the image that I was going to use (you could also free hand any image you want). The easiest way to find a good image is to do a Google search of what image you have in mind. Here is where I found the image of the flag that I used. I copied the image and pasted in MS Publisher so that I could make it the size I wanted.
So I printed out my picture and placed it into a ziptop bag (I am sure you could use other things like page protectors and transparencies. I even thought about trying it on parchment paper but that would be harder to see through.)
Ok, lets talk about paint. There are kits out there that you can buy to make your own window clings and it gives the cling the look of stain glass (see here for examples). You can only order these paints online.
The paint that I use is fabric paint. I have used different kids but my favorite is puffy paint. Regular fabric paint flattens out when it dries and makes it harder to peel it off once it is dry, but is very doable. In the post that I mentioned above I used regular fabric paint. You just have to put it on thicker. Ok on to the tutorial.
I always start out by painting the smallest details first. In this case the stars.
Then I outlined the area I wanted to fill in.
Then I started filling it in going around the starts I painted earlier.
Until it was completely filled in.
Then i did the same thing with the strips outlining the area and then filling it in.
I started in the middle and worked my way down. I mainly did this because I am left handed and if I had started at the top I would have had to reach over the blue part and their was a good chance of me smearing it.
To get the rest I just turned around and filled in the rest.
Here it is all filled in. Now you need to let it dry. Make sure you have it out of reach of little hands because the will be tempted to touch it to see if it is dry. I let it dry overnight.
Once it is dry it is time to peel it off.
Sometimes this can be a little tricky. Most of the time (especially if I use puffy paint) I can just pick at it with my finger nail and it will come up, but sometime you need a little help. I used my exacto knife to help peel the corner away. Then all you have to do is gently peel it off. It should peel off easily but sometimes there will be spots that wont so just use the exacto to loosen them up.
Now here is an important step that I just learned while making this tutorial (and I have made a lot of these so you will always learn something new lol). Once you have it peeled off lay it up side down for several minuets to "cure". When you first peel it off the back side is very tacky and it will stick to itself and you will not be able to get it apart. It shouldn't take more than maybe 5-10 minuets to cure. I think that you should be able to touch it and feel the difference.
Case in point (backside).
(front)
Luckily it was not to bad. What I would do next time to completely avoid this problem is when I go to peel it off, once I have it started I will turn it over and actually peel the plastic off of the cling instead of the other way around. This way the cling stays flat on the table and I don't have to move it once it is off the plastic. Don't worry once it is "cured" it may stick to itself but it should peel easily away.
Now it is ready to cling!
Stick it to your fridge.
Stick it to your wall.
Or proudly display it on your front door.
linking up with


What a fun idea. I love that you can use any type of image.
ReplyDelete-Crystal
Awesome! Great for 4th of July too! Thanks for the tutorial!
ReplyDeleteThat is really cool. Thanks for the tutorial!!!
ReplyDeleteThat is really neat idea!
ReplyDeleteWhat a fun project I think I'm going to do this with my cousins when they come to visit!
ReplyDeleteWhat a great idea! This would be a fun activity for my 3rd graders!
ReplyDeleteThat is great... I have never seen that before but will certainly give it a try soon!
ReplyDeleteLove it!
I adore your patriotic spirit. It is red, white and bluetiful!
ReplyDeleteI hope you will stop by for a bbq on a white tablecloth. :)
Great tutorial! I found your blog via SYTYC, and I'm so glad that the tutorial has finally arrived. Looks like I'll be buying some puffy paint to make some decorations for my son's big boy bedroom!
ReplyDeleteThanks everyone and Cook Clean Craft thanks for being patient with me.
ReplyDelete