Showing posts with label crafts. Show all posts

August 4, 2012

My Pinterest Obsession

I know most of you are familiar with pinterest. I have been a member for awhile now and I am obsessed!! I could spend hours and hours on there. I have completed several things that I have pinned but there are many, many more things that I have pinned that I want to do, like....

an upholstered headboard. I have been wanting to do this for over a year now. Maybe one day I can get to it.

Isn't this wall clock using pictures the neatest thing. This is my next project for sure. I have already started getting my supplies together.


I love words and this silhouette lamp shade is just awesome. I have the lamp I want to use it with I just don't know what word or phrase I want to use yet.


Now these are just genius. It is a 4 room doll house using 3 ring binders. You just have to check out how this is made.

I have recently started pinning fashion ideas. I am obsessed I tell you.

These are just a small sample of things that I have pinned. You can follow me on Pinterest here.

How do you use pinterest? What is on your to do list to do? Please share.


July 20, 2012

I'm Back

For all of you that are still here reading this blog I would like to say thank you for sticking around. I sort of  took a unexpected break for a while. Most of you probably don't know but was verbally attacked by an "anonymous" person in some of my posts. To me this person isn't so anonymous. I know exactly who it was and I even know why they were doing it and that is their problem not mine. That is all I am going to say about that.

So what I have been up to? Well, my divorced was finalized in January so now I am officially a single woman. I am working on growing my etsy shop. If you read this post you will remember my quilled monograms. I think I have really perfected them and have finally set them up in my etsy shop. To check out my shop just click on my etsy button at the top of my left sidebar. Here are some pictures of a few of the orders I have done.


If you are interested in ordering anything put blogreaders in the code box and get 15% off your order. This code is good thru August 4th 2012.

My kids are growing like weeds. Until recently the last time I had their pictures taken where in this post.
Here they are now


It makes my heart ache a little to see how much they have grown.

I have not been sitting idly by these past few months. I have lots more that I want to share but I think I will save them for a post of their own. I also have a few things in mind that I want to start doing along with bringing back my "Quotes to Remember" posts. So keep your eyes out.


June 9, 2011

Outdoor Changing Room

My kids love to play in the pool. They would literally spend all day out there if you would let them.

 As summer seems to be already here I have no problems with them spending lots of time out in the pool. It sure does make bedtime a lot easier. To help cut down on laundry I put up a little clothes line so that they could hang their bathing suits and towels out to dry.

It's only about 4 ft high so they all can reach it to hang their stuff out. The only problem I had then was that they would come in dripping wet after walking through the grass and dirt and that left wet, muddy tracks though the house and on some days they come in just to eat and turn around to go right back out. And sometimes they were too lazy to take their stuff back out to the line. I can't really blame them swimming is hard work, but that left wet suits and towels all over the bathroom floor.

So with the help of my awesome brother we set to work with a solution to my problem.

King of the hardware store
Here is Matt, my brother. He found that thing that he has on his head and crowned himself king. He is just so fun to be around. You can also see that he is carrying an armload of PVC pipe. He insisted on carrying it all. He is sweet like that too.

So this is what we came up with.


It is an outdoor changing room. I didn't take pics of us putting it together (I really need to get better at that). It is made out of PVC pipe and it is 5ft wide x 4ft deep and about 5ft tall. We bought 4 10ft 3/4 inch pipes and cut them down to 6ft. So we had 4 4ft pipes and 4 6ft pipes. The 6ft pipes were hammered into the ground about a foot. They were our 4 corners. The 4ft pipes were our sides and we also got a 5ft pipe that went across the front. 

After figuring out the dimensions I was trying to decide what to use as curtains. My original thought was to use shower curtains but after we found out that we would need three of them and the cheapest that I could find, that were not see through, were $12 a piece I thought I could come up with something better. After looking around we came across some flat sheets and we figured out that if we turned them sideways we would only need two of them and at $5 each it was really a no brainer.

I did have some hemming to do though. Leaving it like it was would make them about 6 inches too long. So I did a double hem of 1 1/2 inches at the top and a 3 1/2 inch hem at the bottom.

Here you can see where I hemmed it at top and added buttonholes so that we could use shower curtain rings to hang it up. It was the first time that I used my buttonhole maker on my sewing machine and after a little practice they were a piece of cake to make.

After cutting all the PVC pipe for the structure we had 2 4ft sections left over so I put them in the bottom hem to help weight it down. They matched up perfect with the 4ft sides. Then in the bottom corners of the front sections I put a 1in flat glass pebble to help keep the curtains closed.

Here is a glimpse of the inside. As you can see I am slowly adding paving stones to help cut down on the grass that sticks to their feet. I have a few more to get.


It turned out a lot better then I thought it would. Now when they get out of the pool they go into their changing room take off their bathing suits, dry off, put on their coverups and then hang their stuff on the line and come on in. No dripping wet stuff to deal with and no wet, muddy tracks all through the house. Then when they are ready to go back out they just put their coverups back on (that is if they have changed out of them) head out, pull their bathing suits off the line change into them and hop back into the pool. Easy peasy. It has really worked out great so far.

So what have you made or want to make/get to make your outdoor summer fun easier?

Linking up with

So You Think You're Crafty
Chic on a Shoestring Decorating 
Lovely Crafty Weekend 
Finding Fabulous 
Fingerprints on the Fridge 
The Shabby Nest 
Tatertots and Jello 
Be Different act Normal
The Creative Crate
Under the Table and Dreaming 
I heart naptime 
Keeping it Simple 
Making the World Cuter 
the DIY showoff
Skip to my Lou
It's so very Cheri
Sumo's Sweet Stuff
Sugar Bee Crafts
Today's Creative Blog
Us and Them 
Tip Junkie 
All Thingz Related
Home Stories A2Z
Sistersstuff 
Someday Crafts 
Somewhat Simple 
Polka Dots on Parade 
Sew Woodsy 
Sweet Peas and Bumblebees

May 19, 2011

Ballard Design inspired.

Last year this picture showed up in Ballard Design's catalog and I remember several projects that were created using this as an inspiration.

Like this
found at Nikki's Nifty Knacks

and this

found at b3 Home Designs


This has been on my to do list since I first started seeing them and I finally got around to making my own. (Better late than never right?). I didn't take step by step pictures but you will get the idea.

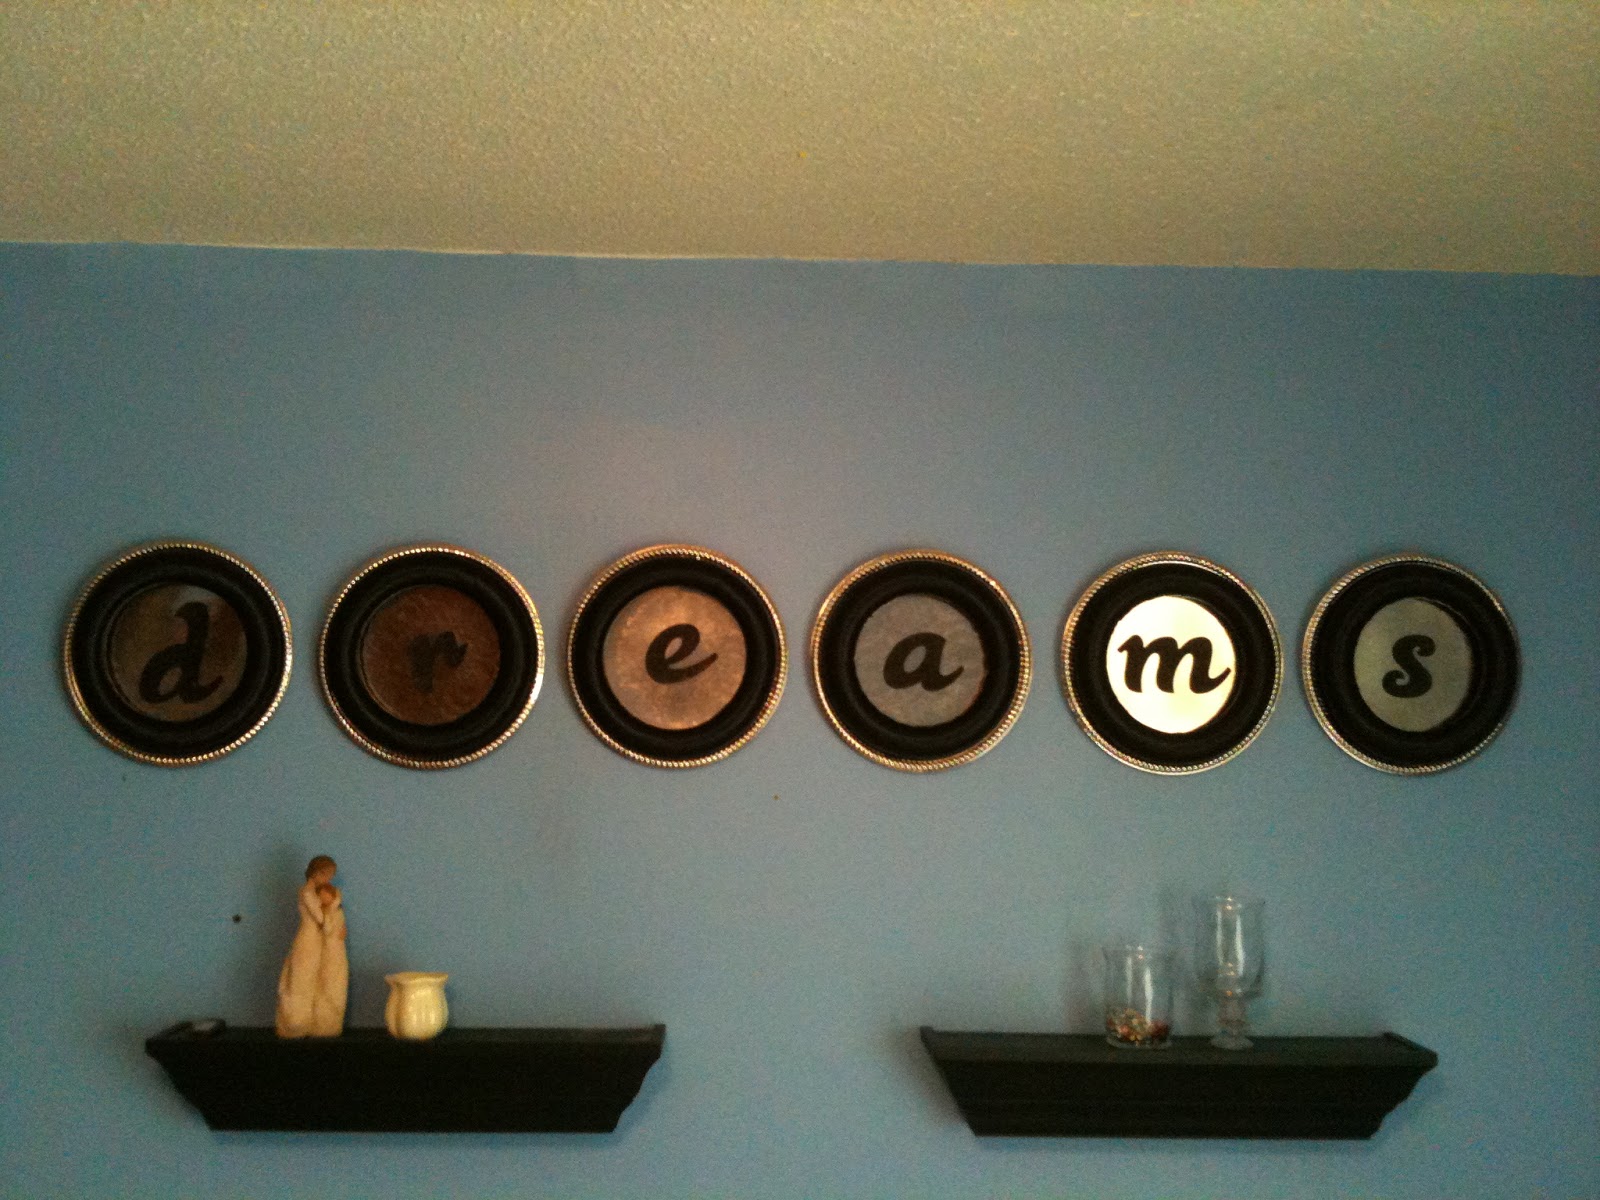
I used foam wreaths from the Dollar Tree, which they don't seem to carry anymore :(. I got 6 of them (thank goodness I got them while they had them).

I tried spray painting them black but they didn't look right. I think I got a matte black and it just turn out aweful. So what I did was I wrapped them in black ribbon.

I also got 6 round silver trays from the Dollar tree and hot glued the wreath to it. Using my Cricut and a program call Sure Cuts A Lot I cut out letters using the font Black Rose.


After cutting the letters out I used Modge Podge and then covered them in Martha Steward glitter (the best glitter in my opinion) to give them some depth. I used the color Onyx.

See so sparkly.

It took me forever to come up with a word. If you have been following my blog for any length of time you know about my love for words. I have been wanting to do this project for almost a year now and I had so many words I wanted to use. Just like in the original I love the word create and thought about using that. I also thought about the words family, love and faith. I had a really hard time deciding. Since these would be going above my bed I finally figured out what word I wanted to use.

If you can't tell it says dreams. I tried to get a good pic but I was using the camera on my phone and the plates kept reflecting the light in funny ways. It looks so good in person.

After I got them all hung up I thought of one more little thing I wanted to add

Using black scrapbooking paper and my Cricut again I cut out the word sweet. I used the font Baroque Script this time.

I love how it turned out. Now I can go to bed every night with sweet dreams.


My next project is going to be a headboard, which has been on my to do list forever also, but I know that I will get it done one day :).

Linking up with

Today's Creative Blog


Chic on a Shoestring Decorating


The Shabby Nest

Lovely Crafty Home


Photobucket

Photobucket

UndertheTableandDreaming

Sister Sister Sunday

Keeping It Simple

The DIY Show Off

Making


The Girl Creative


Sumo Sweet Stuff


Tip Junkie handmade projects

Anything Related


Somewhat Simple