Showing posts with label tutorial. Show all posts

April 20, 2011

CD case Calendar tutorial


Last year for Christmas for my Bunco group I made them simple little calendars using a CD case. I marked the dates that we were playing Bunco each month for the coming year. This gift went over so well with the group that I thought these would go over well to others. These could make great stocking suffers. My kids love having a calender of their own and this would be right up their alley. It's also a great way to recycle all those cd cases that we have laying around.

Now that the time of year to start thinking about what you going to give everyone for Christmas is coming I thought I would share a tutorial on how to make them. You could even make a bunch up to have as little back up gifts. You could even use pictures of your kids and give them to the grandparents.

Here is what you will need:
CD case

Calendar print out
Calendar cover print out
Thin cardboard (I used a cereal box)
Aleene's Tacky glue or notebook compound

The first thing you need to do is prepare your CD case

Some case have a black bottom but the one I had was clear so I actually painted it with a couple of coats of black paint and then taped a black piece of paper into it. (sorry I don't have pictures of this)

 Then you remove the lid and you will want to remove some of the plastic off of the side so that the lid will swing around to the back. See how it is stopping the lid from opening

 About where that little hole is where the arrow is pointing you will want to score the plastic.

I do that by using a utility knife and with firm pressure I push down on the plastic.

then starting on the end and up against the case you will start removing the plastic.Using very firm pressure it will start to chip off. It will actually break off where you scored it.

Repeat on the other side

See where it is broke off. I know that it doesn't look that pretty but it really isn't that noticeable.

Now the lid will swing back and stand up by itself.

Now we will make the calendar.
 
I created the calendar in MS publisher. You want the total size to be 4 3/4" L x 4 5/8" W. Print them out and make sure they are in the right order (don't ask me why I added that part in lol).
.
Then you cut your cardboard to the same size.


Then stack them all together and using binder clips, clip them together making sure that the top edges are as even as possible.

Using Aleene's Tacky Glue you will glue the top edge.

I just my finger to spread the glue on but you can also use a brush.

Make sure you get a good even coat over the whole edge. Then you will let it dry for about an hour.

Now it is time to cut out the cover. It could be of any picture you want. The size it needs to be to fit in the lid is the length needs to be slightly over 4 3/4" and the width needs to be 4 3/4".

Once the notepad calender is dry you will want to slip the cardboard in behind the cover letting the rest be in front of it.

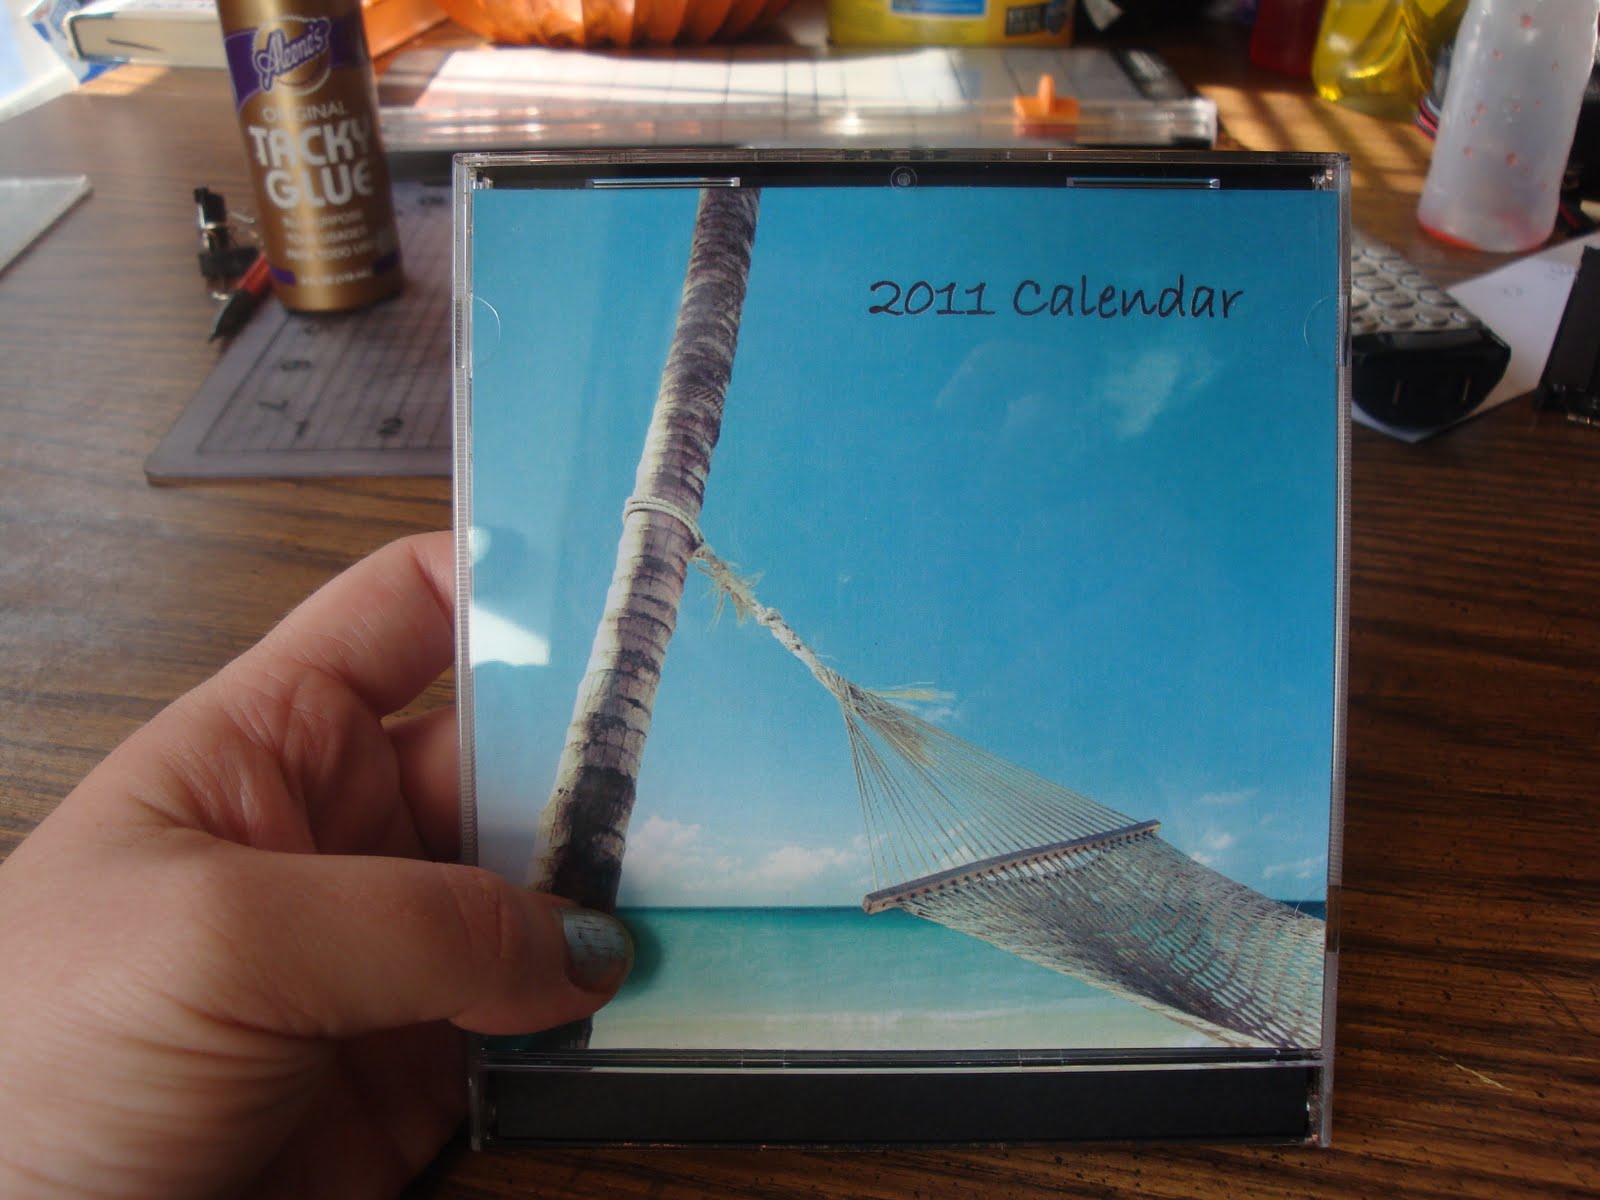
There is your calendar. That stands up on its own.

Here is the view from the back side.

When the month is over just tear it off and you have the next month waiting for you.


Here is the image I used for my Bunco group last year.

Here is a bunch of images that I came up with for covers.

If you have any questions or need me to clarify anything just let me know.

Linking up with
Making


Organize and Decorate Everything


Get Your Craft On 

Visit thecsiproject.com

Kelly

September 27, 2010

Fall and Halloween Wreaths

I have never really been a wreath type of person (except at Christmas of course). But after seeing all the beautiful wreaths around that other bloggers are making I had to try my hand at it.

 Here is one that I made out of leave branches and a wreath form that I got at the dollar store. I used a brownish glittery ribbon that I had on hand to wrap around the wreath form. I just snipped the leaves off of the branch and glued them together in groups of threes kind of forming a triangle. Then I glued them to the wreath sorta of interweaving them. I wish I had thought to take pictures of the different steps. This was my first attempt and I was really unsure how it would turn out, but I am really impressed with myself

After I made this my kids wanted a Halloween wreath so we headed back out to the dollar store to see what we could find. (I did take pictures of this one but I found out later that my 2 yr old had gotten hold of my camera and the lens was smudged so sorry for the blurry pictures).

I got another wreath form and found some small skulls. I had the black ribbon on hand. It actually has purple glitter on it but I think it worked.

The skulls had this bulge that would not let it lay flat on the wreath

so using my utility knife I cut it off.

Then I wrapped the ribbon around the wreath

and glued the skulls on.

Here it is hanging on my door.

Close up shot.


My kids are really excited about it. I think it turned out good.

Linking up with


Making

SYS Thurs


Get Your Craft On Tuesday


August 31, 2010

Silhouette Necklace

I have jumped on the silhouette bandwagon.


At Christmas I made silhouette pictures for the grandparent's presents. Here are the pictures.


I will have to share those later.

There are plenty of directions online on how to make your own silhouette pictures. I made my silhouette pictures by taking a profile picture and then printing it out and tracing around the profile with a pencil using a lot of pressure. Then I turned the picture over and traced over my pencil line that I could see through the paper with a marker and then scanned the outline into my computer. Then using photoshop I filled the outline in.


 To make the necklace I used MS Publisher. I made a 5/8" circle and shrunk the pictures to fit into the circle.

After I got the size I wanted I printed them out and using a 5/8" circle punch I punched them out.

 Then I found a flat glass stone that fit it.

I used Mod Podge to glue the picture to the glass stone.

I put some Mod Podge on the stone

Then I put the picture on. It looks cloudy now but it dries clear.

Then I put on another layer of Mod Podge to cover it and and seal the edges. After it dries I check the edges and if I can still see the edge of paper I put another coat of Mod Podge on. 

After it dried I glued on a flat glue-on bail.

I used E-600 glue.

Then I attached a jump ring to the bail.

Then I attached it to the necklace using beads as spacers so that they lay flatter when worn.


I think they turned out great.

linking up with


SYS Mothers Day


giveaways

Kindred Spirit Mommy


Visit thecsiproject.com